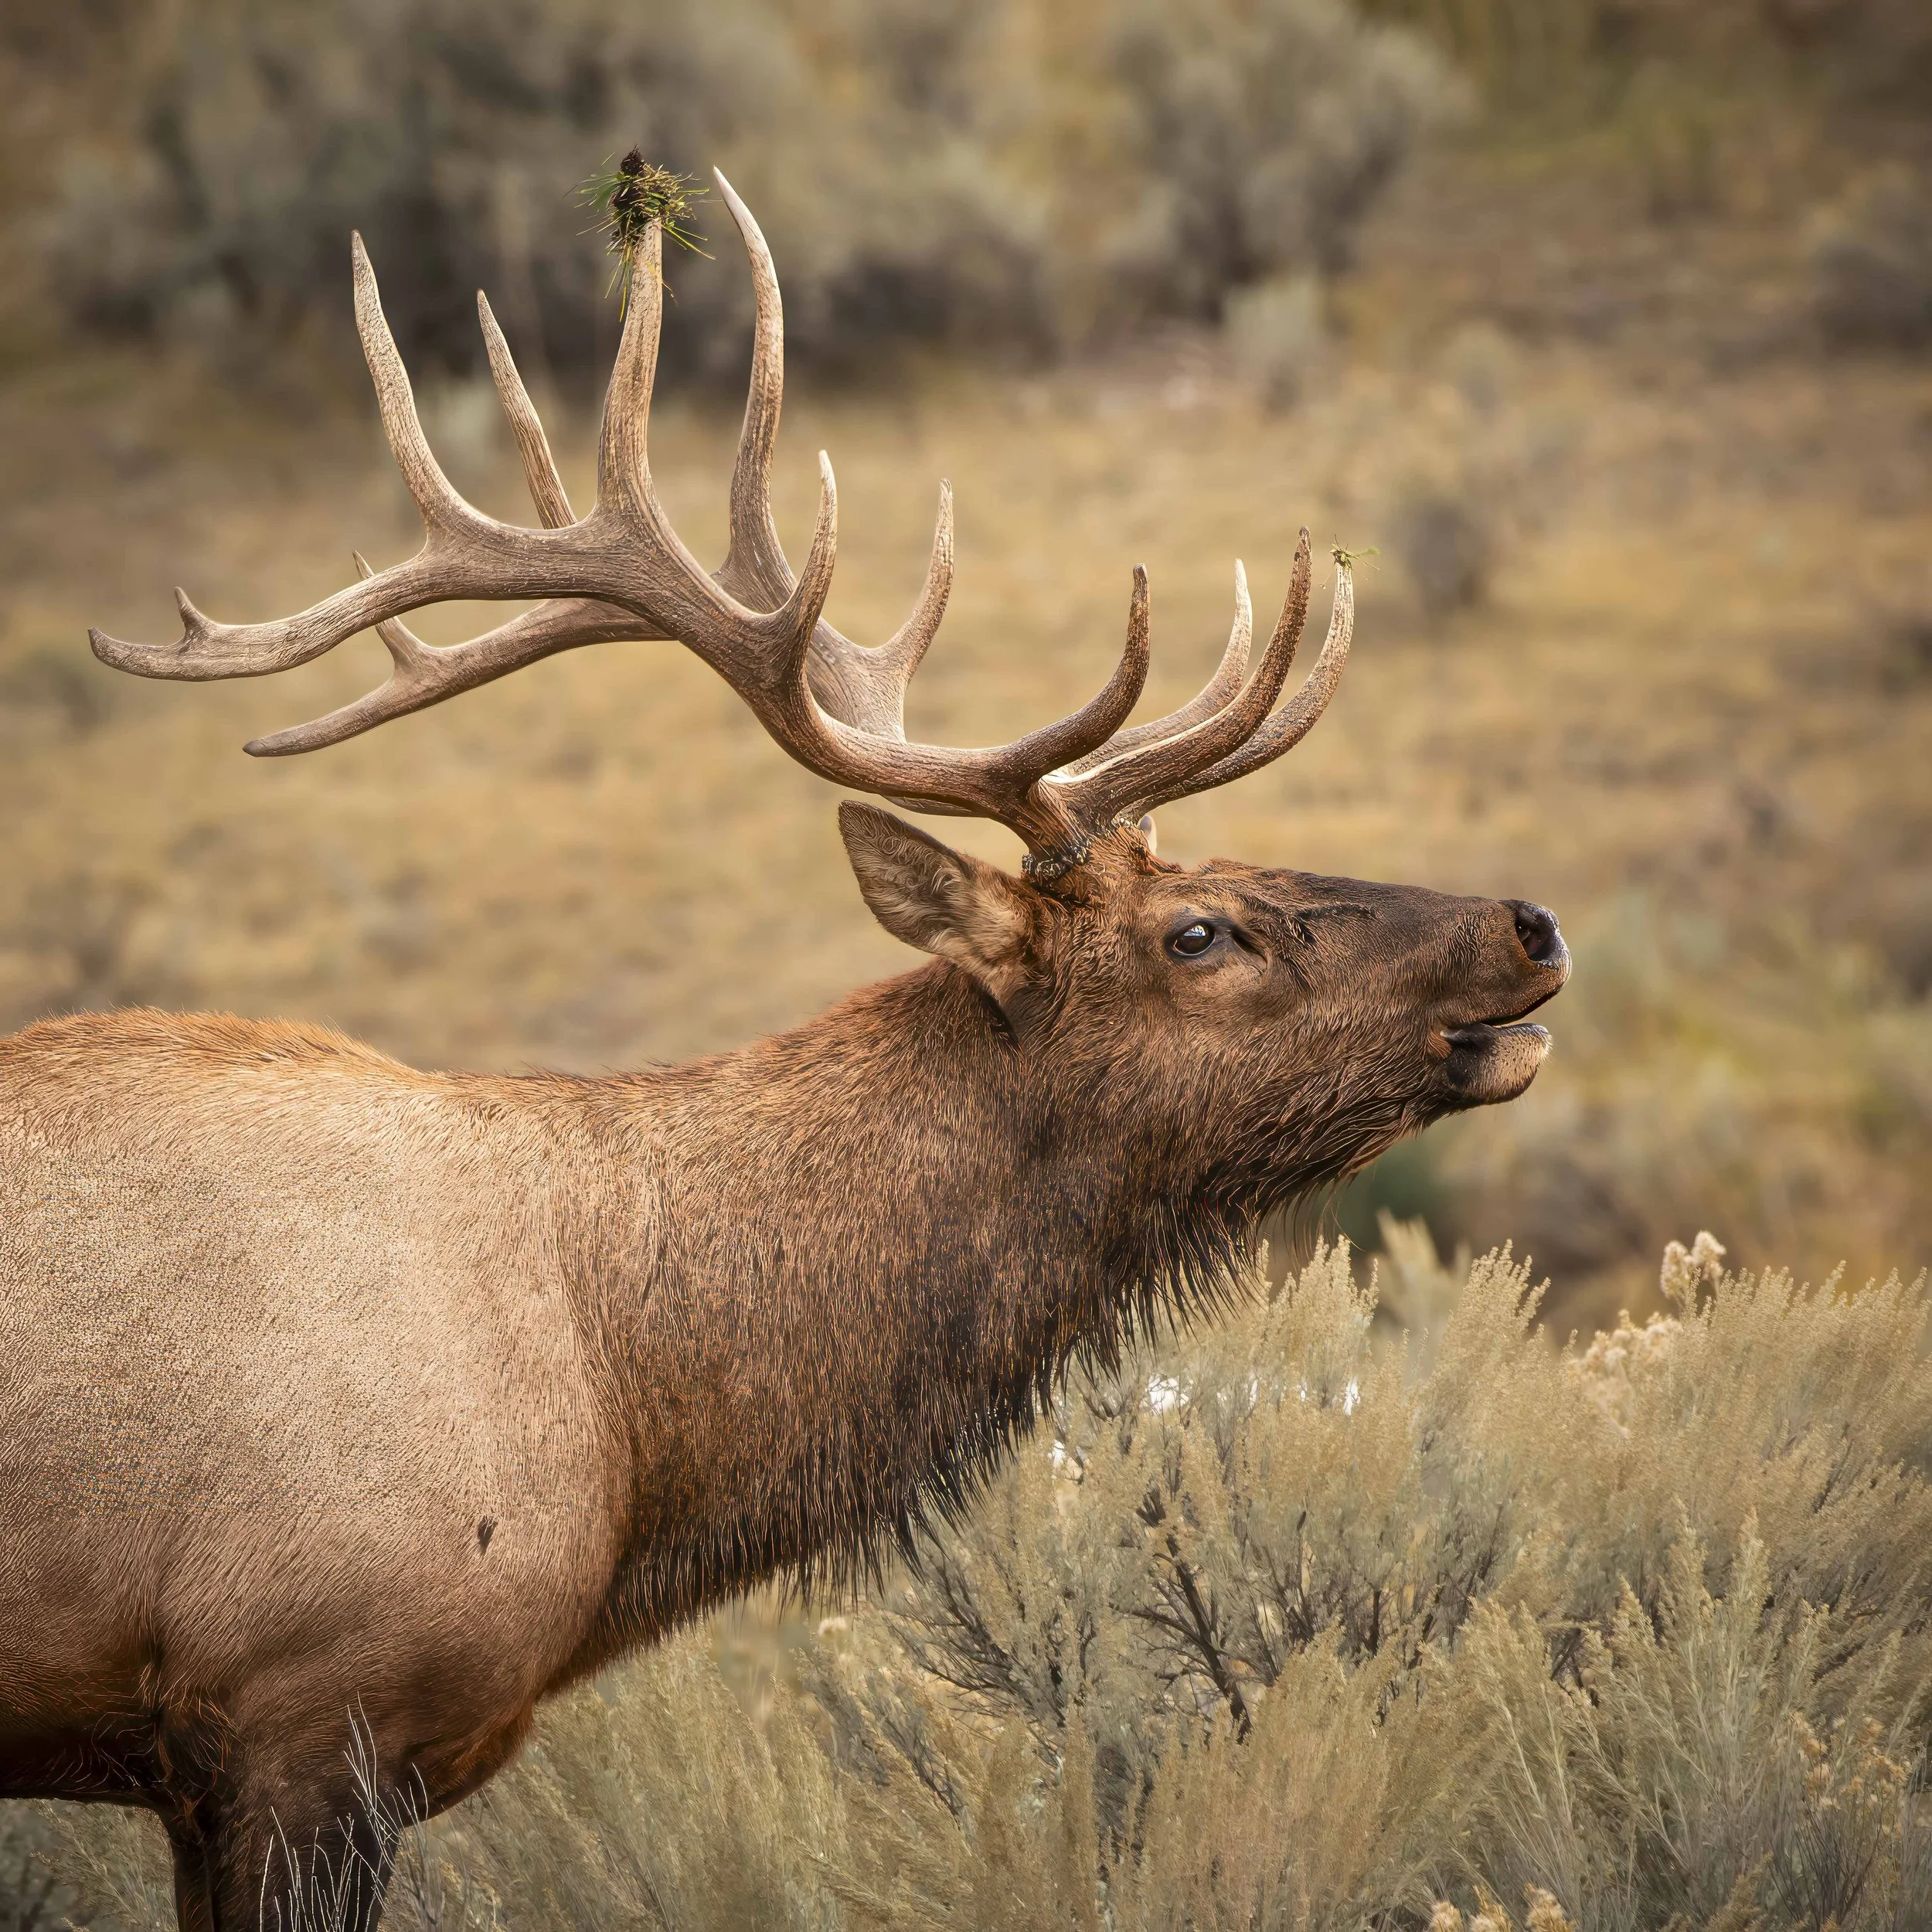
Elk Bull
“Look deeper into nature, and you will understand everything better.” Albert Einstein
The Story
Timing is everything in photography. Sometimes it’s measured in fractions of a second. Other times, it’s simply being in the right place at the right time.
When my wife and I visited Yellowstone National Park in September 2017, I was not expecting to see a herd of elk cows resting near the Mammoth Hot Springs lodge. September is the height of the elk rut, and mature bulls were bugling and sparring for the right to mate.
This photograph was taken near our cabin about two hours before sunset. An overcast sky softened the light, bringing out the rich browns of the bull’s coat and the subtle textures in his antlers. I was standing a little over 100 feet away, close enough to hear every bugle echo across the valley.
Even after all these years, I can still hear that sound.
That’s what I love about photography. It’s a time machine. A single image can carry you back to a moment—to the sights, the sounds, even the smells. You remember the crisp autumn air, the tension of the rut, and the anticipation of waiting for the bull to raise his head one more time.
Behind the Lens
Now that we’ve explored the story behind the photograph, let’s look at how the image was made.
I captured this photograph in manual exposure mode, selecting both aperture and shutter speed while using the camera’s built-in light meter as my guide. Rather than allowing the camera to determine the exposure automatically, I prefer to make those decisions myself. Once I establish the exposure I’m looking for, it remains consistent from frame to frame, regardless of changes in the background.
For this image, I selected an aperture of f/11 to provide enough depth of field to keep the bull’s eye, face, and antlers sharp. I then adjusted the shutter speed until the light meter indicated the exposure I wanted. With the exposure set, I could concentrate on the elk’s behavior instead of constantly watching the camera’s meter.
Shooting in Manual mode takes practice, but I’ve found it to be one of the most rewarding skills I’ve learned as a photographer. As you become comfortable reading the light meter and making your own exposure decisions, the process becomes second nature. More importantly, you begin to understand why a photograph succeeds instead of simply trusting the camera to make those decisions for you.
One setting may surprise experienced photographers. This image was made handheld with a 500mm lens at a shutter speed of just 1/60 second. Under most circumstances, I would have preferred a much faster shutter speed, especially when photographing wildlife. The overcast afternoon limited the available light, and rather than increase the ISO or open the aperture further, I accepted the slower shutter speed.
It was a calculated risk.
The bull had paused between movements while bugling, giving me an opportunity to steady myself, control my breathing, and gently squeeze the shutter. Had he suddenly turned his head or begun walking, the image might have been blurred. Wildlife photography often requires making decisions based on the conditions in front of you rather than waiting for perfect light.
I often bracket my photographs by keeping the aperture constant and varying only the shutter speed. Keeping the aperture fixed preserves the depth of field, while changing only the shutter speed gives me several exposure options to evaluate later when reviewing the RAW files. Bracketing is especially valuable in landscape photography, where the scene is usually static, and you have time to capture multiple exposures. It provides a safety net when photographing scenes with a wide range of brightness and helps preserve important shadow and highlight detail.
Before making any adjustments in Lightroom, I always examine the histogram. Think of it as a graphical representation of the photograph’s tonal values. It shows how the image is distributed from the darkest shadows on the left to the brightest highlights on the right. A quick glance tells me whether I’ve preserved detail throughout the tonal range or lost information in the deepest shadows or brightest highlights.
The histogram for this photograph confirmed what I saw in the field: a well-balanced exposure with no significant clipping in either the shadows or highlights. The broad concentration of midtones reflects the warm browns of the elk and the surrounding grasses, while the gradual taper toward both ends of the graph indicates that detail has been preserved throughout the image.
I’ll discuss histograms in much greater detail in a future article. Learning to read one may seem intimidating at first, but it’s one of the most valuable skills a digital photographer can develop.
Field Notes
-
Camera: D800
Lens: AF-S 200-500mm f/5.6 ED VR
Tripod: No
-
Focal Length: 500 mm
Exposure Mode: Manual
Aperture: f/11
Speed: 1/60 sec
ISO: 400
File Format: RAW